Experts in the Sales, Hire and Service of lifting, Winching, Jacking and Load Securing products to a wide range of markets and industries

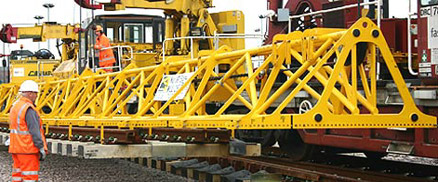
Experts in the Sales, Service and Hire of a wide range of Lifting, Jacking and Materials Handling products to the rail industry.

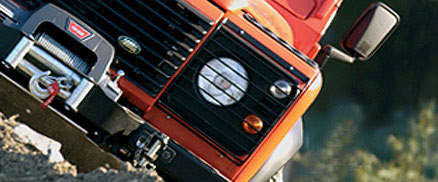
Arbil 4x4 is dedicated to bringing you the best brands, best quality and best technical support to give you maximum off roading enjoyment.


Arbil Latest News

How to inspect a Fall Arrest Harness

September 2nd, 2010

Inspecting your fall arrest harness may seem a tiresome activity but should be an essential part of your routine

Break up the inspection into these steps

Check the “label”

  • Confirm that the “label” has an individual serial number
  • Confirm that the “label” has a valid inspection date and there were no reported problems
  • Confirm the manufacturing date is present and that the harness does not exceed the five year working life*

Hardware check

Check condition of rear “D” Ring for:

  • Distortion
  • Fatigue/Rust (Excess of 15% surface coverage: rule of thumb, if you can rub the rust off between thumb and forefinger then it is unacceptable)
  • Cracking
  • Burrs
  • Nicks
  • Excessive Wear

Check plastic back plate, Fasteners, Web tidies, Adjusters and Connectors for:

  • Excessive wear
  • Cracks
  • Damage
  • Discolouration

Software check

  • Hold the harness up by the shoulder straps and ensure that the webbing hangs evenly
  • Connect buckles and ensure harness is not distorted and hangs correctly
  • Check webbing for signs of UV (Colour fading is a good indication of UV damage and is easiest to identify when comparing to a new harness)
  • Check webbing for signs of Chemical damage (Staining is a good indication of Chemical damage and can be identified if the harness appears brittle or hardened)
  • Check Condition of webbing by running through thumb and forefinger

in all cases software, must be free from: -

  • Cuts
  • Fraying
  • Excessive Abrasion

It is worth noting that proper care and cleaning of a fall arrest harness is just as important as the inspection itself.

Care:

  1. Store in a clean, dry place away from direct sunlight
  2. Do not use a drying room to dry webbing products
  3. Do not stand on a harness when donning/removing
  4. Do not use marker pen or solvents
  5. Clean using non biological detergent at a low temperature

Cleaning:

  1. Before an inspection make sure equipment is clean.
  2. Wash in warm soapy water with a sponge and hang to dry naturally.
  3. Never expose to heat and never use a drying room.
 

Top tips before you go off roading

September 2nd, 2010

Before you go on your adventure sollow these tips so you are prepared and ready for any situation when off roading.

Check the Basics – Check all your fluids -coolant, oil, windshield washer fluid, power steering fluid, brake fluid, ATF, differentials, etc. Make sure there are no leaks, everything is at the proper level, and carry extra fluids just in case.  Also check the air filter and the air filter box for debris. Also, if you are aware of any mechanical or electrical problems with your 4×4, repair them before hand.  

Check the Tires - Check the condition of your tires, including the spare. Be sure they are all inflated to the proper highway speed pressures.  Take note of your tread and think about the terrain you will be traveling on.  Are you ready for that deep mud hole with that tread?

Ball Joints – Check all your ball joints, tie rods ends and wheel bearings by jacking up and securing the front of your 4×4. Grab the tire by the and at the top and bottom, and check for any excess movement by rocking the wheel in and out. Do the same by rocking the tire side to side. Any excessive free play should be checked out by a qualified mechanic. Also check the rear in the same manner.  In solid rear axles you’re checking for worn bearings and other damage. 

Shocks – Check your shocks for signs of leakage or damage or just plain worn out.  Your going to need those shocks. 

Plan the Trip / Inform Others – Tell those that should know where you are going, when you are leaving and when you’ll be back.  Let them know when they should start to worry about you if they haven’t heard from you.  Give them contacts in case they need them. Prepare your trip.  Have a map of the area you are going to and how you should get there (and home again). 

Weather – Watch the weather for the region you are visiting and the route along the way.  Be prepared with the appropriate clothing and protective gear (rain jacket, hats, sunglasses, lip balm, sunscreen). Pack extra clothing in case you get wet or it gets a little colder than expected.  Even if you are not “planning” to stay the night, its good to have a sleeping bag.  Its better to be over prepared than under prepared.  

Communications to the World - Pack a cell phone and give it a full charge before departing.  Pack the phone car adapter or the 120 volt charger along with a power inverter.  When you’re remote and offroad, you can still find a signal even if its atop a ridge or up a tree.   Be aware that if your are out of signal range, your cell phone will be hunting for a signal and this will deplete your cell phone’s battery quicker than just sitting in standby when in range.

Food / Water - Bring plenty of food and drink.  Even on the short trips. Bottled water, energy bars, and dried fruit, sports drinks, anything that has compact energy are good items to pack. Pack items that do not need refrigeration. Avoid salty foods such as chips and salsa, beef jerky, unless you have plenty to drink.  And no, beer doesn’t count.  In fact it takes water to metabolize alcohol so the beer and liquor will dehydrate, not hydrate you.  Alcohol is never a good idea when you have to think clearly.

Simply following these 4×4 tips will ensure you ave a great experience


Using lifting beams correctly and safely

July 28th, 2010

Lifting beams may incorporate various loose and detachable items of lifting gear. You should not use defective or distorted beams or attachments. Lifting beams are generally designed for a specific purpose and should not be used for other purposes without consulting the supplier. This will include the size of crane hook from which they are suspended. On no account should lifting beams be suspended from unsuitable size hooks. The weight of the beam, together with its attachments, must be added to the weight of the load when calculating the total load that will be imposed on the crane hook. Ensure that the SWL on the individual lift points is not exceeded. Extra care is needed where these are adjustable. Ensure the load is stable and that the beam remains at its intended attitude during use. Particular care is needed when lifting and setting down as not only may the load become unstable but individual lift points may become overloaded. Use tag lines to control long loads. Do not allow the beam to foul the underside of the crane, or any other obstructions, when raising or transporting loads.

ALWAYS

  • Store and handle lifting beams correctly
  • Refer to the safe use instructions for slings and attachments used with the beam
  • Include the self weight of the beam and attachments when calculating the load imposed on the crane hook
  • Ensure the load will remain stable when lifted.
  • Ensure that no one lifting point becomes overloaded by the slinging or handling methods
  • Use tag lines to control long loads

Never

  • Use lifting beams to handle loads other than those for which they are designed
  • Fit lifting beams to a hook other than those for which they are designed
  • Use damaged or distorted lifting beams and attachments
  • Unevenly load lifting beams
  • Allow lifting beams to alter attitude during use
  • Allow lifting beams to foul the underside of the crane or any obstructions in the area.
 

Safe use of slings

July 28th, 2010

When using slings you should be familiar with the safe use of slings. Slings should only be used by trained operatives who understand the methods of rating and application of mode factors:

<!– /* Font Definitions */ @font-face {font-family:”MS Mincho”; panose-1:2 2 6 9 4 2 5 8 3 4; mso-font-alt:”MS 明朝”; mso-font-charset:128; mso-generic-font-family:modern; mso-font-pitch:fixed; mso-font-signature:-1610612033 1757936891 16 0 131231 0;} @font-face {font-family:”\@MS Mincho”; panose-1:2 2 6 9 4 2 5 8 3 4; mso-font-charset:128; mso-generic-font-family:modern; mso-font-pitch:fixed; mso-font-signature:-1610612033 1757936891 16 0 131231 0;} /* Style Definitions */ p.MsoNormal, li.MsoNormal, div.MsoNormal {mso-style-parent:”"; margin:0cm; margin-bottom:.0001pt; mso-pagination:widow-orphan; font-size:12.0pt; font-family:”Times New Roman”; mso-fareast-font-family:”MS Mincho”;} @page Section1 {size:595.3pt 841.9pt; margin:72.0pt 90.0pt 72.0pt 90.0pt; mso-header-margin:35.4pt; mso-footer-margin:35.4pt; mso-paper-source:0;} div.Section1 {page:Section1;} –>

  • Good slinging practice must ensure that the load is as safe and secure in the air as it was on the ground and that no harm is done to the load, lifting equipment, other property or persons.
  • Establish the weight of the load, ensure the lifting method is suitable and inspect the sling and attachments for obvious defects. Prepare the landing area  making sure the floor is strong enough to take the load. Follow any specific instructions from the supplier.
  • Ensure the lifting point is over the centre of gravity. Any loose parts of the load should be removed or secured. Secure the sling firmly to the load by hooks onto lifting points or shackles etc. The sling must not be twisted, knotted or kinked in any way.
  • Use packing to prevent damage to the sling from corners or edges and to protect the load.
  • Do not exceed the SWL or rated angle. Any choke angle must not exceed 120° and any basket 90°.
  • Do not hammer, force or wedge slings or accessories into position; they must fit freely.
  • When attaching more than one sling to the hook of the appliance use a shackle to join the slings and avoid overcrowding the hook.
  • Use an established code of signals to instruct the crane driver.
  • Ensure the load is free to be lifted and not, for example, bolted down.
  • Check that there are no overhead obstacles such as power lines.
  • Keep fingers, toes etc clear ensuring they do not become trapped when lifting, lowering or controlling loads.
  • Make a trial lift by raising the load a little to ensure it is balanced, stable and secure and if not lower it and adjust the slinging arrangement.
  • Where appropriate use tag lines to control the load.
  • Except where special provision is made, do not allow anyone to pass under or ride upon the load. The area should be kept clear.
  • Make a trial set down, ensure the sling will not become trapped and the load will not tip when the slings are released. Use supports which are strong enough to sustain the load without crushing.
  • Never drag slings over floors etc or attempt to drag a trapped sling from under a load.
  • Never use a sling to drag a load.
  • Place the hooks of free legs back onto the master link and take care to ensure that empty hooks do not become accidentally engaged.
  • Never use slings in contact with chemicals or heat without the manufacturers approval.
  • Never use damaged or contaminated slings.
  • On completion of the lift return all equipment to proper storage.

Establish the weight of the load, ensure the lifting method is

suitable and inspect the sling and attachments for obvious

defects. Prepare the landing area making sure the floor is

strong enough to take the load. Follow any specific

instructions from the supplier.


Tips for Recovery Strap Use

July 28th, 2010

When using recovery straps it is important to know you are clear on what you are doing.  These tips offer some handy advice:

  • Before ever using the strap, make sure it is in good condition ( no cuts, frays, or broken stitching.)
  • Make sure the hardware being used is free of defects and rust. This includes your tow hooks or front hitch and the hardware on the other vehicle. If possible, the recovering vehicle should place the recovery strap to its rear end, which would be the safest place if the strap happens to break.
  • Some older cars actually have tow hooks, but if not you must use your own judgment. Never attach a recovery strap to a vehicles bumpers, axles, suspension, steering rods, or a trailer hitch ball. The attach points must be to a secure place on the vehicles frame. Do not place the recovery strap on another vehicle in a way that it may be cut.
  • Never, ever, attach a recovery strap to another vehicle with a knot. You should pass one end of the strap through the loop at the other end of the strap to secure it on.
  • Incase the strap may break, lay a tarp or some jackets on top of the recovery strap. When the strap breaks (lets hope for the best, but prepare for the worst), the jackets or tarp will slow the recovery strap down before it hits someone.
  • To help protect the strap from tears, make sure all logs and large rocks are removed from the recovery path. Everyone should stand clear of the recovery strap when it is in use.
  • When pulling the vehicle out, drive very slowly. Sudden tugs may lead to damage to either of the vehicles or the recovery strap.
  • Once the vehicle is safely removed, inspect your recovery strap and hardware and hit the road!
 

Arbil Divisions

  • Arbil
  • Arbil Lifting Gear
  • Arbil Rail
  • Arbil 4x4
  •  

    News Categories

  • Arbil 4×4 (28)
  • Arbil Lifting Gear (30)
  • Arbil Rail (38)
  •  

    News Archives

    The Blue Cube Web Design